NtChat


## 介绍
- 基于pc微信的api接口, 类似itchat项目
- 支持收发文本、群@、名片、图片、文件、视频、链接卡片等
- 支持好友和群管理
## 支持的微信版本下载
- 下载 [WeChatSetup3.6.0.18.exe](https://github.com/tom-snow/wechat-windows-versions/releases/download/v3.6.0.18/WeChatSetup-3.6.0.18.exe)
## 帮助文档
- 查看 [常见问题](docs/FAQ.md)
- 查看 [常用示例](examples)
- 查看 [NtChatHttp接口示例](fastapi_example)
- 加入群聊 [PyXCGUI&NtChat交流群](https://jq.qq.com/?_wv=1027&k=oIXzbTbI)
- 查看 [PyXCGUI项目](https://github.com/smallevilbeast/pyxcgui)
## 安装
```bash
pip install ntchat
```
国内源安装
```bash
pip install -i https://pypi.tuna.tsinghua.edu.cn/simple ntchat
```
## 简单入门实例
有了ntchat,如果你想要给文件传输助手发一条信息,只需要这样
```python
# -*- coding: utf-8 -*-
import sys
import ntchat
wechat = ntchat.WeChat()
# 打开pc微信, smart: 是否管理已经登录的微信
wechat.open(smart=True)
# 等待登录
wechat.wait_login()
# 向文件助手发送一条消息
wechat.send_text(to_wxid="filehelper", content="hello, filehelper")
try:
while True:
pass
except KeyboardInterrupt:
ntchat.exit_()
sys.exit()
```
## 获取联系人和群列表
```python
# -*- coding: utf-8 -*-
import sys
import ntchat
wechat = ntchat.WeChat()
# 打开pc微信, smart: 是否管理已经登录的微信
wechat.open(smart=True)
# 等待登录
wechat.wait_login()
# 获取联系人列表并输出
contacts = wechat.get_contacts()
print("联系人列表: ")
print(contacts)
rooms = wechat.get_rooms()
print("群列表: ")
print(rooms)
try:
while True:
pass
except KeyboardInterrupt:
ntchat.exit_()
sys.exit()
```
## 监听消息并自动回复
```python
# -*- coding: utf-8 -*-
import sys
import ntchat
wechat = ntchat.WeChat()
# 打开pc微信, smart: 是否管理已经登录的微信
wechat.open(smart=True)
# 注册消息回调
@wechat.msg_register(ntchat.MT_RECV_TEXT_MSG)
def on_recv_text_msg(wechat_instance: ntchat.WeChat, message):
data = message["data"]
from_wxid = data["from_wxid"]
self_wxid = wechat_instance.get_login_info()["wxid"]
# 判断消息不是自己发的,并回复对方
if from_wxid != self_wxid:
wechat_instance.send_text(to_wxid=from_wxid, content=f"你发送的消息是: {data['msg']}")
try:
while True:
pass
except KeyboardInterrupt:
ntchat.exit_()
sys.exit()
```
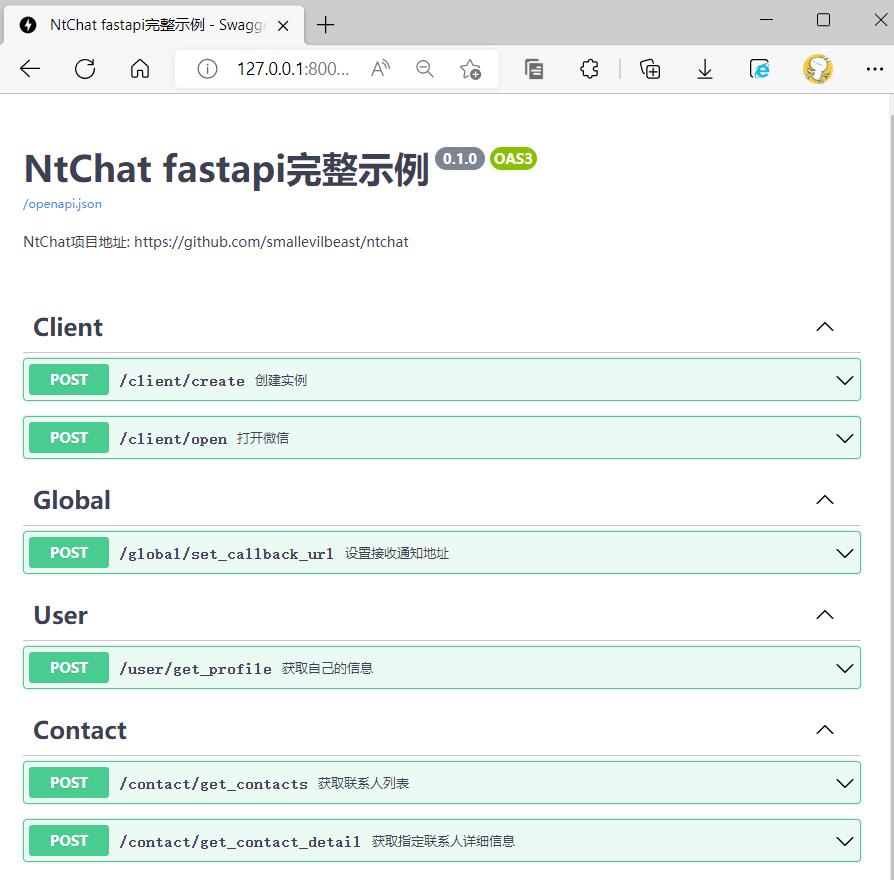
## 使用fastapi框架实现的web api接口
通过fastapi的swagger在线文档可以很方便的管理NtChat接口
[查看fastapi_example例子](./fastapi_example)
## 使用pyxcgui界面库实现的简单例子
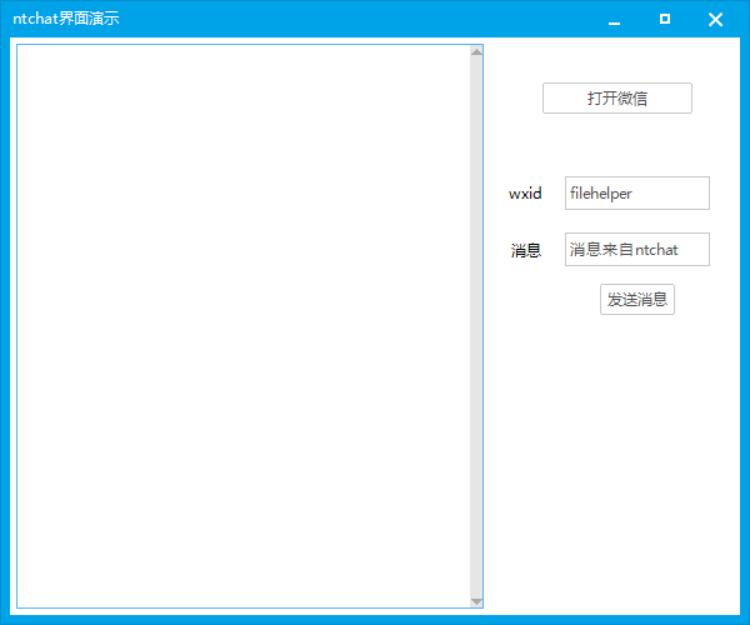
代码如下:
```python
# -*- coding: utf8 -*-
import xcgui
import ntchat
from xcgui import XApp, XWindow, RunUiThread
class NtChatWindow(XWindow):
def __init__(self):
super(NtChatWindow, self).__init__()
self.loadLayout("resources\\send_text_ui.xml")
self.setMinimumSize(600, 500)
btn: xcgui.XButton = self.findObjectByName("btn_open")
btn.regEvent(xcgui.XE_BNCLICK, self.on_btn_open_clicked)
btn: xcgui.XButton = self.findObjectByName("btn_send")
btn.regEvent(xcgui.XE_BNCLICK, self.on_btn_send_clicked)
self.edit_wxid: xcgui.XEdit = self.findObjectByName("edit_wxid")
self.edit_content: xcgui.XEdit = self.findObjectByName("edit_content")
self.edit_log: xcgui.XEdit = self.findObjectByName("edit_log")
self.edit_log.enableAutoWrap(True)
self.wechat_instance: ntchat.WeChat = None
def on_btn_open_clicked(self, sender, _):
self.wechat_instance = ntchat.WeChat()
self.wechat_instance.open(smart=True)
# 监听所有通知消息
self.wechat_instance.on(ntchat.MT_ALL, self.on_recv_message)
def on_btn_send_clicked(self, sender, _):
if not self.wechat_instance or not self.wechat_instance.login_status:
svg = xcgui.XSvg.loadFile("resources\\warn.svg")
svg.setSize(16, 16)
self.notifyMsgWindowPopup(xcgui.position_flag_top, "警告", "请先打开并登录微信",
xcgui.XImage.loadSvg(svg), xcgui.notifyMsg_skin_warning)
else:
self.wechat_instance.send_text(self.edit_wxid.getText(), self.edit_content.getText())
@RunUiThread()
def on_recv_message(self, wechat, message):
text = self.edit_log.getText()
text += "\n"
text += str(message)
self.edit_log.setText(text)
self.redraw()
if __name__ == '__main__':
app = XApp()
window = NtChatWindow()
window.showWindow()
app.run()
ntchat.exit_()
app.exit()
```
帮助&支持
-------------------------
点击链接加入群聊 [PyXCGUI&NtChat交流群](https://jq.qq.com/?_wv=1027&k=oIXzbTbI)